
This wasn’t a bad starting point : https://www.youtube.com/watch?v=vPgS6RsLIjk
It’s important to remember, when you’ve created a sprite, that you need to add a SpriteSkin. Sometimes it fails to automatically detect the bones in your sprite, but so far, that’s been simple to solve by making a few minor changes to the sprite, reapplying, and then the “CreateBones” button in the SpriteSkin successfully works. If you have an existing animation, you can drag and drop it onto the sprite. Next step – animation transitions.
In the Animation pane you can create a new animation from the drop-down, but to create links between those elements you’ll need to make sure the Animator window is visible (Window->Animation->Animator). There you can make links between the various states (https://www.youtube.com/watch?v=HVCsg_62xYw). How can we have those state transitions occur without scripting? It turns out that the transitions already happen, but you need to “Play” a scene containing the model.
Where the ordering of limbs is incorrect, go into the SpriteEditor>SkinningEditor and set the individual bone depth, by selecting the relevant bones.
The next issue will be transitioning sprite parts (rather than just animating their position). My best guess is that we’ll end up animating enable/disable/active on alternative game objects inside the Animator (I hope). Yep. That was quite intuitive. Place the object you want somewhere inside the bone hierarchy of the sprite (inside the scene editor) and then, in the Animation pane, add a property for that object for “enabled” and animate it.
I suspect that, to enable the pupil to move freely around, I’ll have to add a mask around the “white” of the eye.
This is quite exciting. A lot of opportunities for clearer communication and more interesting and interactive scenes have just opened up 🙂
Ultimately, I’d like to create a 3D representation (mesh) of the mascot, and a toon shader to go with it, which would be the most flexible approach but for now I’ll create the basic poses I need to start with as .SVG, then export to sprites and animate.
I seems that one can create too many bones. The issue I’ve run into is that slicing the sprite prevents the unity editor from allowing me to create bones which span the different sprite parts (surprise, it’s still buggy). However, using autogeometry to split up the sprite, makes it almost impossible to control when the bones overlay each other (e.g. around the eye) and control over things like mouth expression is currently beyond me using the inbuilt approach.
I suspect the way to do this is, is to create a completely separate multi-sprite for the eye and another for the mouth (with multiple expressions in the multi-sprite), and then to place these inside the bone object hierarchy.
A potential problem with this approach is that alterations to the bone structures seem to invalidate the sprite skin / bone editor in the scene – requiring it to be destroyed and recreated, which will lose all my setup 🙁
So, that worked well (I think).
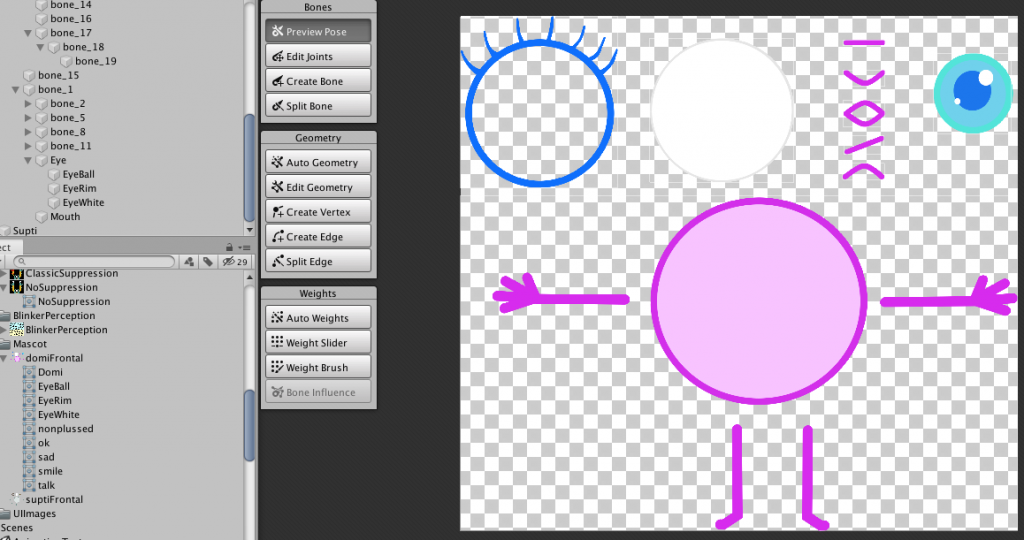
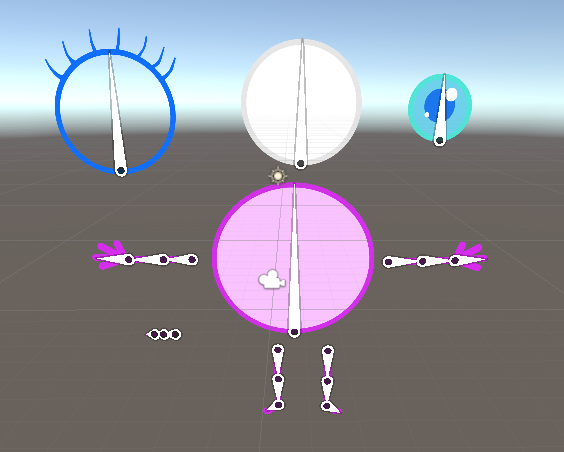
There are eight sprites along the top, and only the collection of body parts below are skinned. On the left in the scene hierarchy, you can see the other parts are placed under the body bone – with each game object having a “Sprite Renderer” added. Is there are better way. The different parts of the multi-sprite are always visible in the object panel beneath the scene hierarchy.