
Each user test is an exciting event. Each user test throws up at least half a dozen “aha” or “why didn’t I think of that” moments, driving on and further inspiring development. In our most recent user test (yesterday evening with Mr R) there were some obvious but useful minor improvements we could make to help practitioners, and a couple of major issues were also raised about determining what the participant is really perceiving.
I think it might be interesting to share what such an iteration looks like – so lets go through it in chronological order from a bit of a developer perspective!
We started with :
Monocular Suppression
Straight off the bat, the participant is shown a large disc which is quite bright, in their right eye. The practitioner can change the brightness of the disc, and its size, but this initial configuration is so visually striking that it is unlikely to show up any but the most fundamental problems…. which means the practitioner must immediately start reducing brightness and size (increasing the object’s distance). We simply reconfigure the initial starting position (size) of the disc to be more distant (smaller) and less bright. If the participant reports they can already perceive the disc, then the participant can simply switch the active eye, establish the same is true, and move on to the more interesting tests.
Looking in MonocularSuppressionController.cs we see that the initial starting distance is hardcoded (in fact, derived from where the two fixation discs have been placed in the environment within the Unity Editor) and the starting luminance is calculated by a hardcoded decrement which implicitly makes assumptions about the starting luminance of the supplied gameObject. This is all pretty ugly – but it is a prototype. So, lets do a little tidying up while we’re at it. We define two public variables for setting the initial distance and luminance :
public int startingDistance = 15;
public int initialBrightnessInPercent = 10;
These now appear inside the Unity Editor as simple variables the developer can manipulate before a new release – meaning that we can more easily adjust these values to find a good compromise, or somebody basing an alternative scene on this scene will have an easier life:
We already have already written two functions “alterLuminance” and “alterDistance” which take generic GameObjects as arguments, but both these were built to take increments as their secondary parameter – i.e. to alter distance or luminance by some amount. They were not written to take absolute values, which is the nature of those new starting values. We update these two functions to take a third argument “bool absolute” which allows us to say whether the value we supply is to be treated as a relative or absolute value. I’ll spare you the code just now.
Binocular Suppression
When testing the binocular suppression scene, I noticed several irritations (logical inconsistencies) and bugs which need fixing.
This is what the starting scene looks like now :
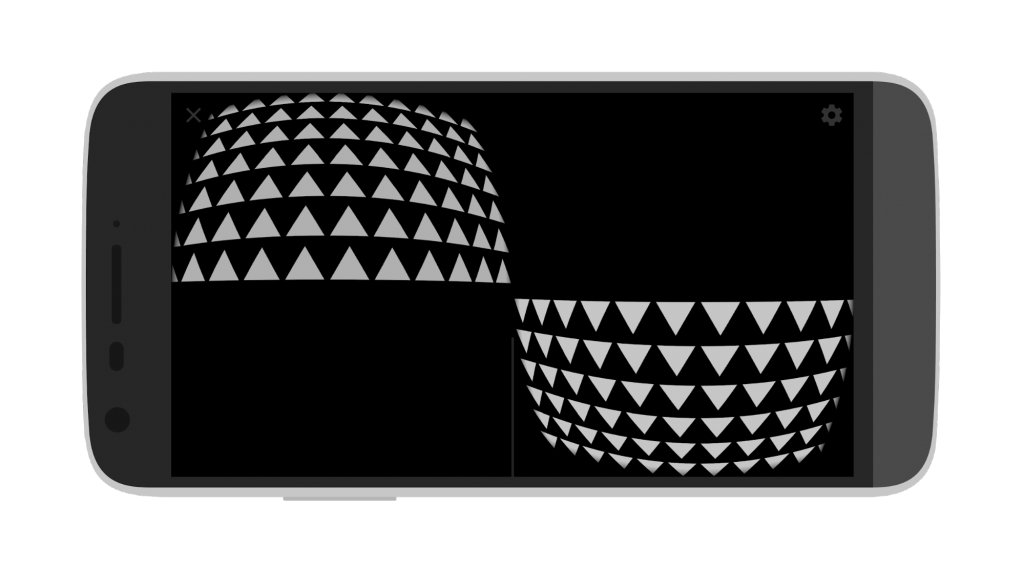
The mind perceives this to be a single space with triangles pointing upwards in the upper half, and triangles pointing downward in the lower half. The initial idea was to use the arrows to indicate the direction in which the participant should move their head to affect the luminance of that particular grid – however, not only was this counter intuitive as we actually darken the grid when tilting the head in the indicated direction, it doesn’t much help the practitioner understand which eye is suppressed if they can’t remember whether the up arrows are in the left/right eye and vice versa. This is particularly obvious when we place the two sets in conflict :
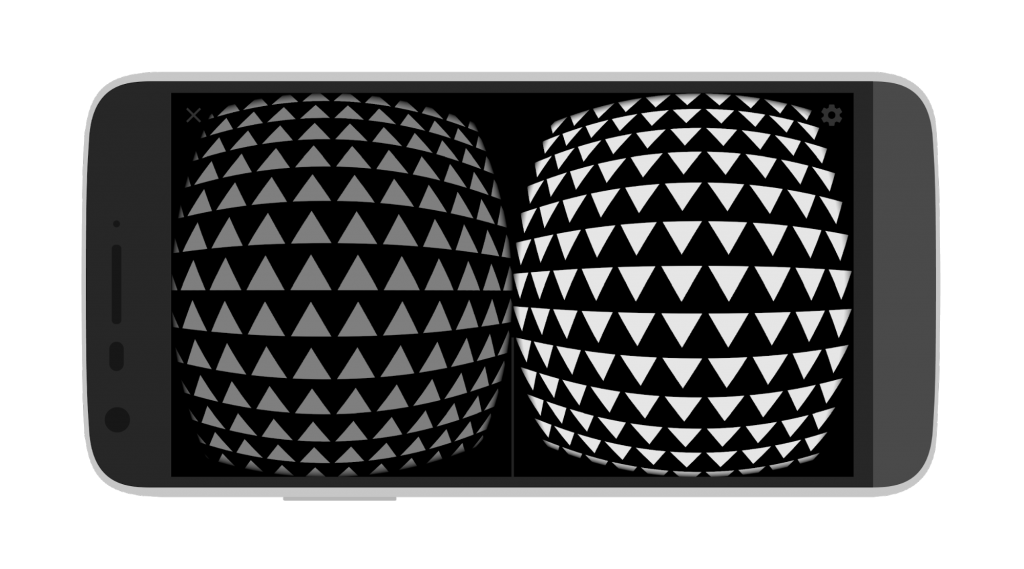
…and the participant suddenly reports only seeing “up” or “down” arrows. Which eye did they belong to again? So, lets simply make the arrows on the left point left, and the arrows on the right point right. If the participant reports that they can only see the arrows pointing right, then we know the left eye is suppressed! This is as simple as rotating each TileGrid in the editor around 90 degrees. If you create your own scene, you can use any type of grid or object you like, the code remembers the starting positions you set in the editor when moving into and out-of conflict mode.
In the first test, nothing looks like it should. It turns out we also hardcoded the non-conflict positions for the grids, which no longer makes sense now we have rotated them and thus altered the position of their geometric centers (they are rectangular rather than square). We therefore modify the system towards a more general solution, storing the initial position of the tile maps, as specified in the editor, as our initial non-conflict positions – and then derive our non-conflict positions.
Misalignment Measurement
There were no major problems in the Misalignment Measurement, other than the WebUI was locking the opposite eye to that intended. The WebUI auto-generation is specified in the Start() function of the DetectEyeRotation Class. Can you spot the obvious typo? 🙂
Remote.instance.RegisterButton(“unlockRight”, “Lock left eye”, “Right eye is strabismic”);
Remote.instance.RegisterButton(“unlockLeft”, “Lock right eye”, “Left eye is strabismic”);
Remote.instance.RegisterFloat(“degree”, –45f, 45f, 1f, “Misalignment”, “Angle between the eyes.”);
No? Me neither. There isn’t one. What was confusing is that we are talking about “locking” rather than “unlocking” in the U.I. – unnecessary mental gymnastics when the practitioner will naturally be focused on unlocking the strabismic eye.
This also threw up the issue that a practitioner may want to be able to re-lock and re-set an eye – after a mistaken unlock or if the participant is alternating. Rather than introducing extra U.I. elements and controls, we simply allow the user to make repeated selections, which automatically reset and re-lock the opposing eye. Specifically, we have to rotate the previously unlocked “eye” (camera) back to it’s original position and then tell Google VR that it is no longer to be used to track rotation. Here’s an example for the process whilst unlocking the right eye.
private void unlockRightEye(){
eye = StereoTargetEyeMask.Right;
rightCamera.GetComponent<TrackedPoseDriver>().trackingType = TrackedPoseDriver.TrackingType.RotationAndPosition;
EyeSkills.UserCalibrationManager.instance.userCalibration.rightEyeIsStrabismic=true;
EyeSkills.UserCalibrationManager.instance.userCalibration.leftEyeIsStrabismic =false;
//relock left eye
leftCamera.transform.Rotate(Vector3.forward – leftCamera.transform.eulerAngles);
leftCamera.GetComponent<TrackedPoseDriver>().trackingType = TrackedPoseDriver.TrackingType.PositionOnly;
}
While we’re at it, we’ll improve the practitioner’s Logging output to report the angle of misalignment in a more human friendly way.
Depth Perception
The testing with Mr R. highlighted a quite serious problem with the remaining scenes. It simply wasn’t obvious whether or not he was using both eyes at any particular moment, or just one. The nature of strabismus and amblyopia is such that he can’t tell himself, either!
Another aspect to this is, if he was suppressing, why would he not have been able to see both given that we ought to be inheriting the suppression breaking ration from our Binocular Suppression scene? Well, we can’t address this until we have more feedback about the state of suppression.
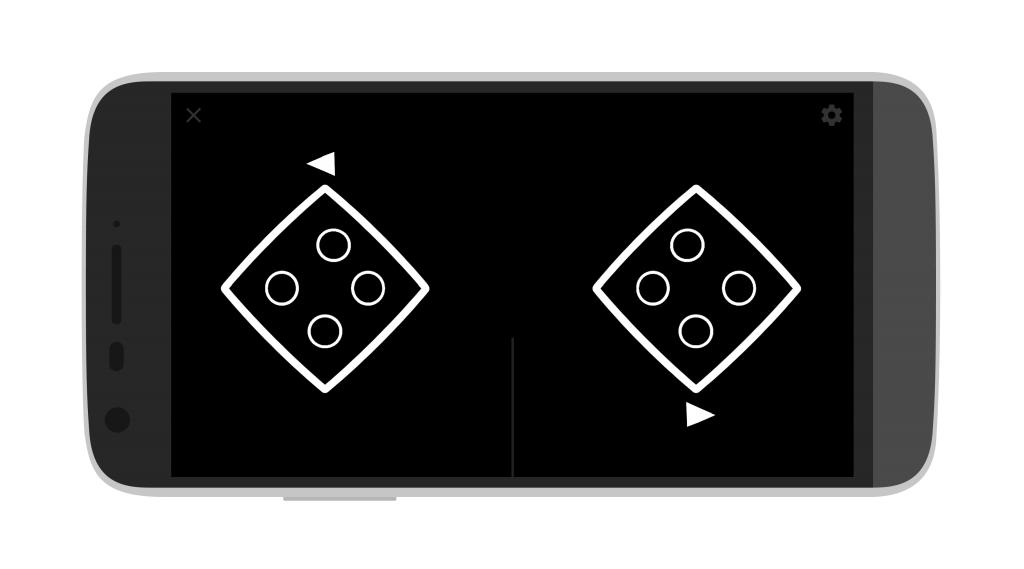
The quickest and simplest technique I can think of, is to drop two triangles into the scene, one pointing left (only visible to the left eye) and one pointing right (only visible to the right eye). This might, in fact, be quite a general solution. If they are vertically separated around the central axis and surrounded by space, they ought to be quite robustly visible whether eye-misalignment compensation is active or not.
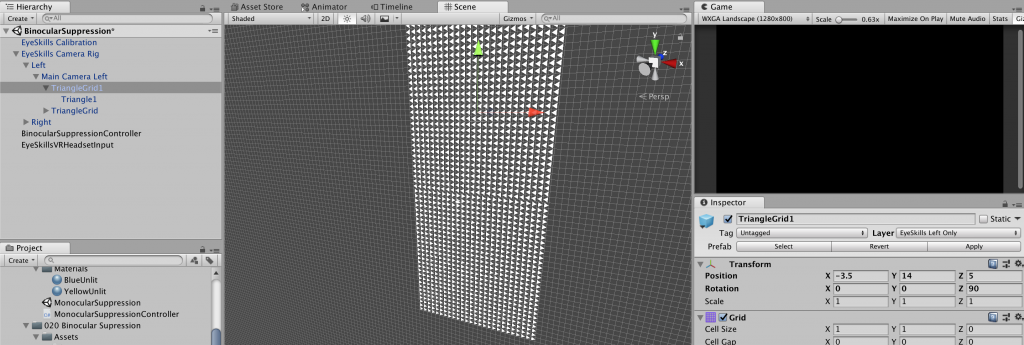
We create a triangle sprite and drag two into the scene positioned on the central vertical axis, pointing in different directions:
Next we set them to exist on only the appropriate EyeSkill layers for their respective eyes. We now have some means to check whether the participant is binocular or monocular as they are performing the depth test.
Eye Misalignment
We have a similar, but slightly different, issue with the eye straightening relative to depth perception. Mr R. was reporting seeing only a single disc which, after a time, would suddenly and instantaneously become two non-overlapping discs. This sounds a lot like the discs reached the point where they were perceived as being sufficiently distant from one another that his conflict cells were no longer firing, and suppression was instantaneously broken.
We need to know more precisely what is happening, before we start to worry about why the binocular suppression ratio works sometimes, but not other times.
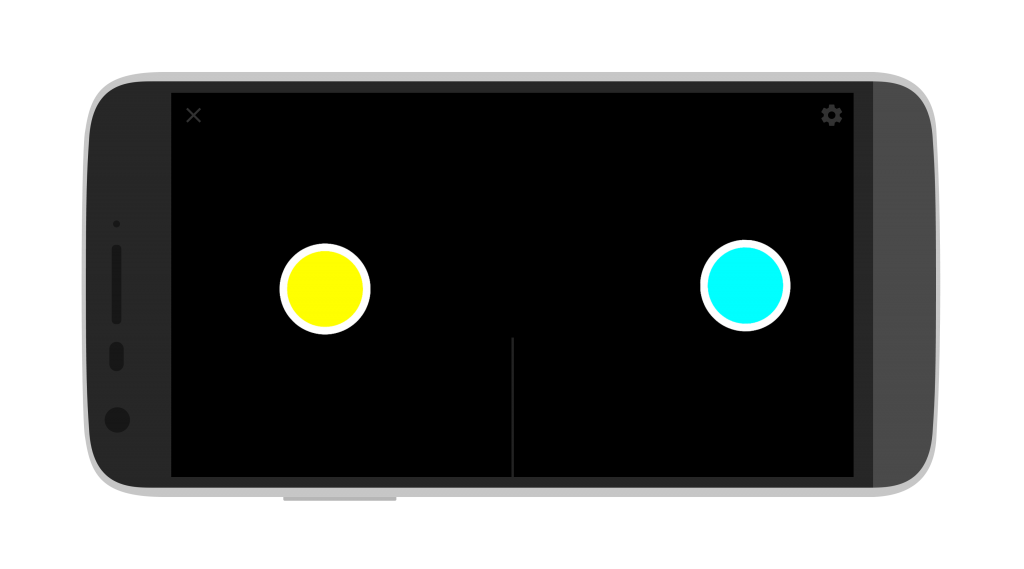
Adding arrows in the manner above, however, isn’t the right solution in this case. The participant is focused on, and needs to stay focused on, the circle(s). We might half-fill each circle in an opposing manner, but I feel for now, we need to try the same trick as in the eye misalignment scene, and fill each circle with an cyan/yellow (ok for colour blindness) to ask them which colour they are seeing (cyan/yellow or the impossible colour caused by the mental mixing of both from different eyes).
In the current implementation we have a single ring visible to both eyes. We shall simply have two rings placed in the identical location, but each ring visible only to one eye, and each ring filled with a different colour.
Alternating fusion
This was a particularly interesting situation with Mr R. He reported seeing the alternating colours, but they were always beside one another and in a fixed non-overlapping position. I suspect that what was happening here, is that he was not suppressed. Due to the large amount of black space in the background, and the fact that we do not inherit the eye misalignment compensation from the calibration settings, the two circles will appear to be in different positions and thus no conflict is triggered. This is the opposite of what we want. We want conflict and thus suppression to be triggered. We want to force the alternation of the suppressed eye at an increasingly rapid rate.
The solution we will try here is to introduce a conflicting background similar to that in the Binocular Suppression scene (which we know works). We shall allow the practitioner to activate/de-activate this at will, to explore what happens. By using arrows pointing left/right it should also be simple for the participant to communicate their perceived world.
I also feel that it would be particularly useful to start at 0Hz, with both circles visible, so it is initially possible to ascertain that the conflicted state is occurring without further confusion.
We copy our PreFab grids from Binocular Suppression and orient them. Now we create a parent object which contains both and hook it into the scene’s control system. We already have a “conflict” mode which shifts each circle into a vertical separation, but this seems a little useless, so we override that functionality to activate/deactivate our conflict inducing backgrounds.
Unfortunately, the way the alternation is written relies on a desired Hz cast to a wait time (in seconds) – so holding the two circles static means an infinitely high wait time. Because changes in Hz are calculated as increments of that wait-time, we are not in a good place in terms of making fast and simple changes to the code. This highlights a design flaw, so we shall take this opportunity to make all functions depend explicitly on Hz and deduce the “secondsToWait” from this.
Conclusion
These are all quite minor changes but ones which will make a significant difference in ease of use and the ability to deduce what a participant is really perceiving. Time well spent, I hope 🙂